Showing posts with label DIY Dogs. Show all posts

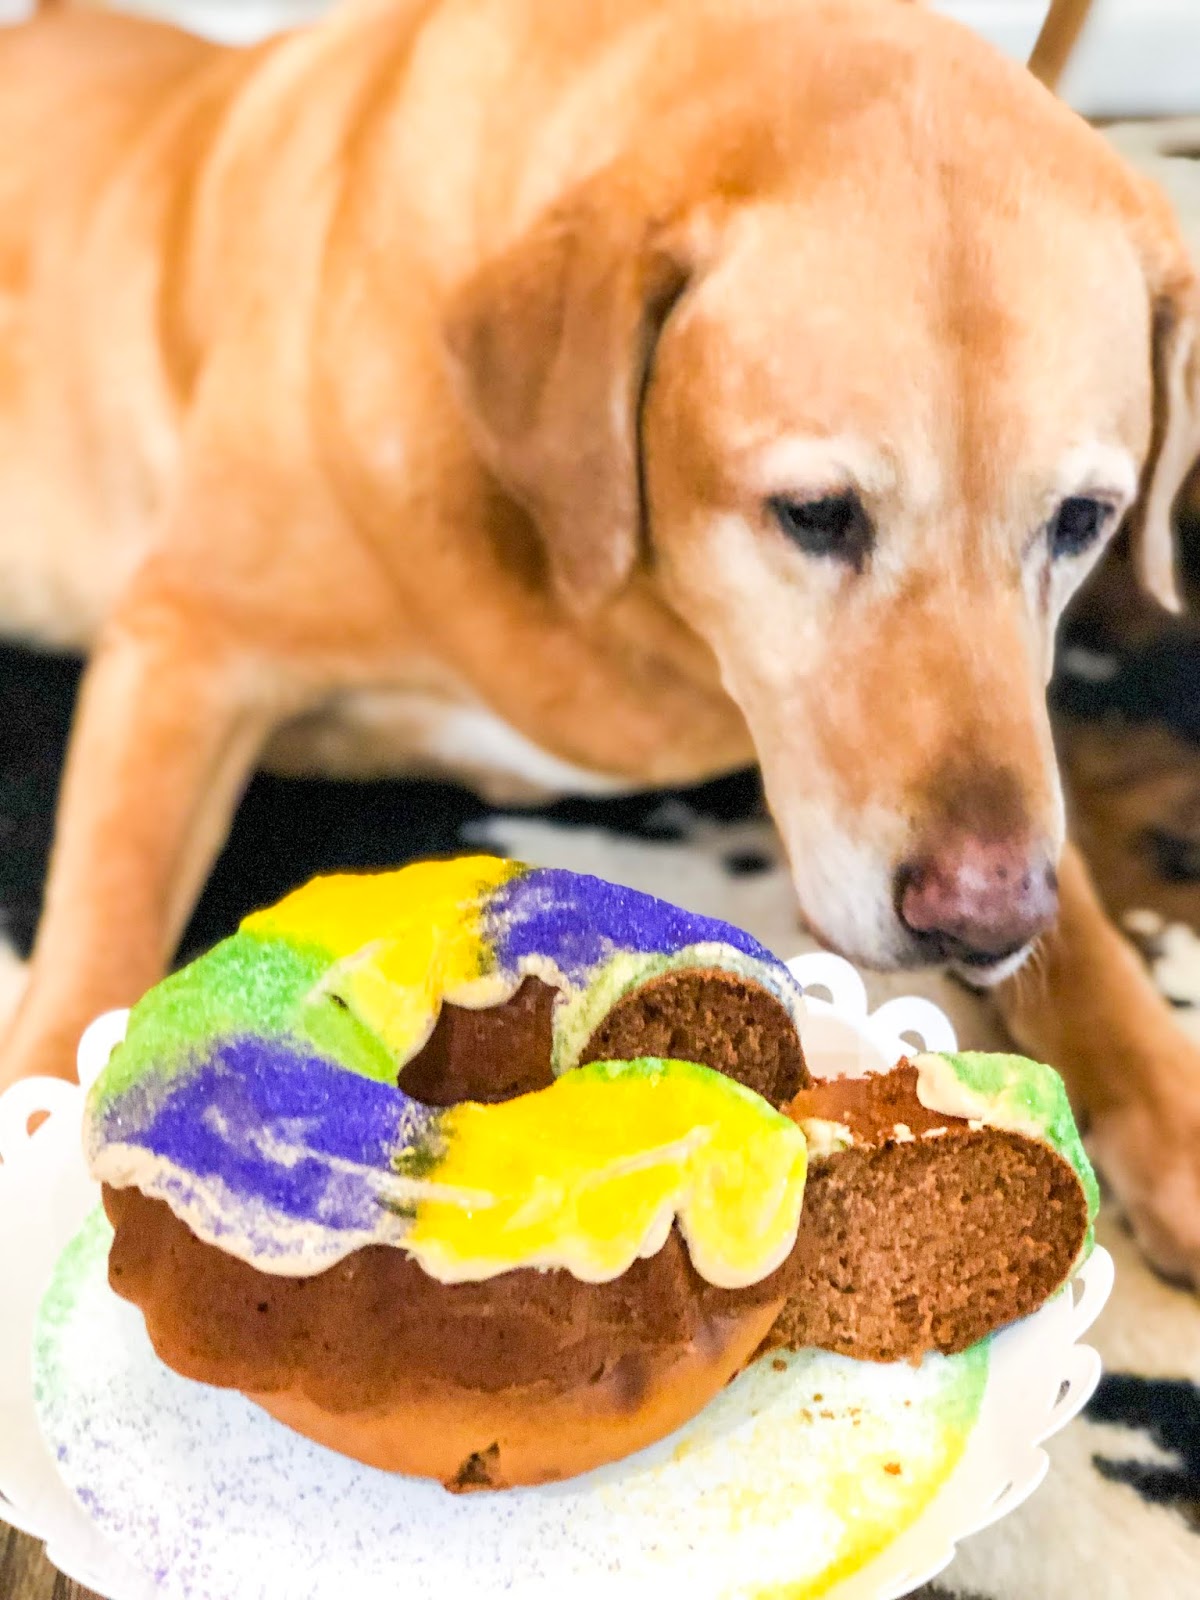
Doggie King Cake Recipe

I spent almost the first decade of my life living just outside of New Orleans so I am very familiar with King Cake and Mardi Gras, but in case you aren't....

A traditional king cake is a cross between a coffee cake and a French pastry in the shape of an oval. It's decorated in three colors, purple to symbolize "Justice",  green for "Faith" and gold for "Power" and these colors were chosen to resemble a crown to honor the wise men who visited Jesus on Epiphany (the visit of the Magi to Jesus). A small plastic baby is commonly hidden in a king cake. The person who finds the baby in their piece is named "King" for the day and must provide the king cake for the following year.

So there you go! I find it fascinating and fun!


I wanted my "children" to participate in the tradition so I adapted my dog birthday cake recipe to be a King Cake today!

This cake recipe is my dog birthday cake recipe, so it doesn't have to be just King Cake.
I make my dog cakes in a bundt pan but you may use whatever you like, just know the cooking time will differ depending on the pan you use.

Halloween Dog Costume Ideas

I cannot believe that Halloween is so close! And it finally feels like fall so I feel justified in making pumpkin cookies and treats for myself and not just my doggies :)

I found myself beginning to think about what to have my dogs be for Halloween. I, myself, hate dressing up in costumes, but I choose to believe my dogs love it, even if only so they can tear their outfit to shreds later...

And I will not spend any kind of serious money on a costume for my dogs, one because they are monstrous and instead I should look for costumes for miniature ponies, and two because I have no money to spend.

Therefore I looked all over the internet for some clever, inexpensive ideas and I thought I would share them.
This I think is my favorite one. One because I have never seen it before and never saw it since this picture, so I guess you could say it's unique. It is one of those that is so simple everyone wishes they thought of it. But alas, I don't have an adorable football sized brown lab....maybe I need one?
This made me laugh out loud! Adorable!!! This dog has the perfect coloring for it. My dog on the other hand is the perfect SIZE OF A COW, but is blonde...this one isn't for me, but I couldn't pass up posting its cuteness!!


Now this is more my style, cheap, easy and incredibly appropriate! Molly would hate being stuffed in a box, but if I could even get one picture out of it, it might be worth a try.


This is also tremendously appropriate for my beast of a dog. I like this cause it's easy. All you need is one piece to make the costume. She would look ridiculously cute!!! How can I decide?


Ah, all great aspirations aside, let's be honest. This is what she will actually wear for Halloween, except it will probably be an old t-shirt and not a bed sheet, cause let's be honest, I am thinking about dressing an overgrown puppy and this is probably more realistic.


This is adorable so I had to post. Especially on a bigger dog, Great Dane perhaps! Adorable!


This is just genius! I don't know how they did it, chalk maybe? but it's perfect. The dog wouldn't know anything was on them! 

And if you have this kind of dog, PLEASE, it must be a Target dog! I'm actually a little jealous mine can't pull this off.


This would have worked perfectly with Oreo, my older dog you passed away several years ago. 


Finally, if this is not the most appropriate thing in the world I don't know what is! 


Check out my pinterest to see what other ideas for Halloween I have found!

And be sure your doggie gets their share of tricks AND TREATS this Halloween. I have some very special grain-free pumpkin Halloween dog treats


DIY Dog Treat Vendor Ideas

So after looking through all my pictures on my last post, I will show you how I did it and where I bought everything. I try at all times to stay as cheap as possible, although it may not be the easiest way possible.

To start off, if you are doing your first event I HIGHLY recommend setting up before going. Practice, practice, PRACTICE! I started setting up my table about a week before the event and as I made or crafted things, I set it up then by the time the event came I knew how I wanted it to look, took pictures and then recreated my display at the event.
To help create some depth or whatever kind of look I am talking about, I used cardboard boxes. I used USPS Priority Mail boxes to be precise. I have so many sitting around that I ship dog treats with, so I decided I could use them to set my treat displays on so I didn't have a flat boring table.

I used sticky notes as my temporary labels which turned out to be super helpful because they were not only easy but the perfect size and I used their 3x3 size when making my own labels.

Trying to stay cheap, I looked around my house for things I could use to display instead of buying more stuff. These two metal "trays" are what I use for mail, receipts and papers on my desk.

I was at the dollar store one day and picked up 3 glass jars to see if I would like the way they looked, turns out I did, so I used my handy-dandy sticky notes to show me where I would put the rest of my jars after I went back and bought more.

I numbered the sticky notes according to what item would be displayed there.

Then I slowly replaced my sticky notes with the real deal...

FLAG/LABELS/SIGNS


My individual signs were wonderful and I am in love with them and now use them at every event, shower, party I can! Like I mentioned in my last post, I ran across a sale at Michaels where all 12x12 paper was 6 sheets for $1 so I gathered all kinds of designs and colors that are associated with my shop.

Like I said, I used the size of a sticky note to size up my own signs/labels.

All my colors that I stocked up on :)

I sized and printed them on the computer and then used my handy paper cutter to make sure they had straight lines.

Then I simply double taped the words to the paper and.....

voila! I had some BBQ grilling sticks sitting around the house I measured out and chopped off to use. I taped them to the back of these labels and they were ready to go!
Then I gorilla taped (yes, it's called gorilla tape) to the back of whatever they went on so that they STAYED!

BOXES

Overall, I think I used 7-10 boxes for my display. All I did was tape the boxes together as if they were being shipped and wrap them in all kinds of wrapping paper that I had around the house, of them were even wrapped in tissue paper cause I didn't want to go buy wrapping paper (I told you I'm cheap!)
I used all the sizes, large, medium and small. I wrapped some in the 12x12 paper I bought at Michaels too.


Then I gorilla taped them to the table so they wouldn't be blown away and they worked perfectly! 


OTHER DISPLAY ITEMS

GO to the DOLLAR STORE! Seriously, you will get ideas of your own, plus everything is a dollar. I picked up all these little jars as well as the white baskets at the dollar store and they were great for holding treats! 

Then I used picture frames from around my house. I love black and white so I had a lot of black and white frames that worked perfectly with the color scheme I have for Treat Dreams.

My table cloth (guess you can't call it cloth when it's plastic, but whatever) was 99 cents at Wal-Mart in the party isle. It was the perfect color. I wanted something that would catch everyones attention on that cold yucky day and this did the trick. Although it was only a one time use kind of thing, it was worth it for 99 cents. 


MY BOARD

I highly highly recommend having a board or some kind of place to display other information you want people to know, plus it draws the eye. 

Many people came over just to look at the board! I used only pins on everything. This is a board I use to display things in my room, so I didn't want to glue anything on the board. 
I printed out everything on this board, even the pictures. Although it would be easy to take and print pictures at Walgreens or CVS too.
Put up what you want people to know about you. 
I wanted to create something personal so I put up pictures of dogs that are some of my biggest fans, but I wanted them to know what we are capable of as well, Christmas dog treats and Birthday dog treats. So it was a way to advertise too.

After the event, I found an empty rubbermaid box in the house that I then labeled "Treat Dreams Event Supplies" and I kept everything I could so that I wouldn't have to start from scratch next time I had an event.


This was just my very first event, so I know I will probably change everything and hopefully do much more in the future, but I was pretty please with everything and wanted to share my ideas with you!


Doggie Ingredient Tuesday: Yogurt

Well, I missed a week. I told you I'd be bad at this. Didn't I? If I didn't I should have and now you know. Fall gets to be a busy time (mostly cause I spend all my extra time baking yummy treats for myself......dogs get them all the time so I should too right?)

So I have decided to talk about yogurt today. I try to talk about ingredients that I use either in my treats, or just in my dog's diets. And they LOVE YOGURT!


Another great thing about it, is it's easy!

I buy containers just like this one and keep around just for the dogs. They love it with an afternoon snack or as a topper for their food at meal times!

As always, I reference Dr. Khalsa's book "Dr. Khalsa's Natural Dog: A Holistic Guide for Healthier Dogs." And it has a list of the beneficial bacteria:

lactobacillus acidophilus
lactobacillus bulgaris
lactobacillus bifidus
streptococcus faecium
bifidobacterium bifidum
lactobacillus casei
lactobacillus salivarius

These kinds of bacteria help with bad breath and all kinds of stomach issues (gas, indigestion, constipation etc).

You just need to be aware of the kind of yogurt you and buying and make sure it has some beneficial bacteria in it.
This Dannon yogurt lists that it has lactobacillus acidophilus :)
I am sure yogurt purchased from a health food store will contain more natural cultures and beneficial bacteria (Dr. Khalsa recommends this), but I simply can't afford it and I think this at least helps them and is a very easy way for me to incorporate something beneficial and yummy in their diet!!

There ya go! There is yogurt for this Tuesday!

I don't have any treats that contain yogurt, but my frosting is all natural and yogurt based if you wanna check out some yummy treats :)

www.treatdreamsthedogbakery.com


Doggie Ingredient Tuesday: Pumpkin

Well today was only a high of 85 degrees and when I stepped outside I was pleasantly surprised by these "cool" temperatures. It made me excited for the approaching fall weather (in two months or so). Then I took a stroll through Hobby Lobby and saw all of their Halloween, Thanksgiving and Christmas decorations and then I decided, that I indeed was excited and ready for all, and am going to pretend it is right around the corner and it won't be too long until I get to wear my boots :)  **wishful thinking!!**

To celebrate this "cooler" weather and Hobby Lobby decorations, I will discuss what I have found helpful about pumpkin when it comes to dogs eating it.


My dogs LOVE pumpkin!! LOVE IT! What is nice about pumpkin, is that it's easy!! I have not found anywhere that says fresh is better than canned or yada yada...which is good news for us, cause that means we can find the same great benefits of pumpkin in a can without having to grow pumpkin in our backyards! :)


Benefits:

Constipation: What I read everywhere is that pumpkin is good for constipation in dogs. They recommend adding it straight from the can, to the dog's food, or even serving several times during the day. Anywhere from 1/4 cup - 1 whole cup every day.

Weight: Pumpkin is an excellent source of fiber for your dog and is great when trying to achieve weight loss in your dog. I have cut back in small amounts on my dogs food before and substituted pumpkin to help my dogs lose weight in the past.


How to use?

Like I said, I just (and have read) that it is as simple as opening a can of pumpkin and scooping it onto your dogs food, or just feeding them by the spoonful! I keep pumpkin around all the time (one, because I use it in my dog treats), but also because it is so easy to just scoop on top of my dogs food to give them a boost of fiber and the nutrients associated with this wonderful vegetable!

So there ya have it, PUMPKIN!!! YUM! My dogs love it, and I have to admit, I love it too! I can't wait to start making some goodies with it, although, I think I do need to hold off a little. It is hard to enjoy a nice pumpkin chocolate chip cookie while I am still sweating from the heat :)

Here are some of my pumpkin dog treats! I mix pumpkin and blackstrap molasses to create the ultimate autumn dog treat! They are delicious!


Doggie Ingredient Tuesday: Garlic

When I was looking into health and nutrition changes for my dog, I wanted to know what foods were ok for them to eat! This is harder to find out than I realized. Then if you do find out, you don't know why it is bad, or why it is good.

So I am going to do my best to help anyone else out, and then also learn more about different ingredients myself.

I am going to "try" to post about a new ingredient every Tuesday, until...I run out of ingredients I guess?

I will be using "Dr. Khalsa's Natural Dog: A Holistic Guide for Healthier Dogs" by Deva Khalsa, VMD as my primary source (seriously guys, GET THIS BOOK!). But I will also probably reference information I find from "Dogs Naturally Magazine" which I subscribe to and is fabulous!! Check into it, here. And any other reputable source I find online.

Today..........(drum roll....)       GARLIC!


So is it good or bad?
When I was going my research, I ran across A LOT of places that said "garlic is bad for your dog!" "garlic = dog killer" etc etc.

Come to find out, it CAN be true.......if over used. However, drinking too much water is fatal as well, but nobody would argue that water will kill you, or that it's bad for you.

To quote directly from Dr. Khalsa's book (because she just says it so well) "Research has shown that garlic has antifungal, antibiotic, antiviral , antiparasitic, and anticancer effects."

It just has to be in moderation. Too much garlic causes damage to red blood cells. So how much is too much? Basically you would have to feed your dog A TON of garlic. Something like 10 gloves / meal to make that kind of impact.

How to use it

Raw garlic is best. It is the allicin in garlic that can inhibit cancer formation and allicin is created when the garlic is freshly chopped or crushed. So take fresh raw garlic and either chop or mince or crush it, wait 10 minutes or so and then top of your dogs' food with it. Do not wait more than 20 minutes because it loses it's "oomph" when exposed to heat or air too long.

Although fresh is best, benefits can still be found in powdered or packaged garlic. The allicin may have been destroyed but garlic still helps flush toxins and has antioxidant powers therefore don't give up on garlic all together.

I use garlic in my dog treats. First of all, they add a wonderful smell and flavor. My dogs absolutely love the garlic treats. And mixed perfectly with some parmesan cheese....YUMMMMM!!! Smells like fettuccine!
Treats are a great way to incorporate some garlic in your dog's diet. Check mine out!


Good luck with garlic and let me know how you use it for your dog!


Dehydrating Dog Treats


I have to admit that I have never known that such a thing as a "dehydrator" ever existed.

I guess I supposed that perhaps somehow dehydrated fruit and jerky and stuff was magically created, I don't know, I am not proud of this.

Even when starting Treat Dreams, I started by baking them and then serving them fresh, like a cookie. And just a few weeks ago I was hit over the head with this idea of dehydrating them.

It has been the best.....idea...EVER!

Why?
It takes all the extra moisture out of the treats so they last longer. Mold is caused by moisture, so less moisture = less risk for mold. = longer shelf life. Even if you do not have a business, or sell anything, if you are making them for yourself or for friends, they are so much easier to manage.
They do not crumble as much and retain their shape better.

I have been dehydrating left and right! It is so easy and so fun!

What kind of dehydrator?

I did a lot of researching into what dehydrator to get and everyone seemed to recommend NESCO American Harvest Food Dehydrator. So that is exactly what I got! I think it's called the FD-37. It has four trays. And being as knowledgeable about dehydrators as I have confessed to be, I knew nothing about what it meant having "4 trays".

So here is the scoop. I am able to dehydrate (depending on the size of your treat) approximately 4-5 pounds of 2 inch dog treats at a time. If I have my bigger treats in there, it is considerably less, probably half as much.

Not all treats are dehydrated equally

So when I did my looking into this online, I saw that people said anywhere from 4-8 hours for dehydrating dog treats, and some of them said they dehydrated theirs overnight!?

I did this.......and I had the hardest and most breakable dog treats you have ever seen your life.

FAIL...

            Look at moisture: Keep in mind that every single treat is different! I have one recipe that has A LOT of moisture in it, and it can take up to 12 hours to dehydrate while another recipe has very little moisture in it and takes maybe 2 hours max!


            Look at size: I have small bones that are 2 inches long and bigger treats that are 5 inches long and that makes a difference even if they are the same recipe. The thickness as well will make a difference.

How long do they dehydrate?

Such a good question and one I never found the answer to until I had cracked and crumbled so many treats and probably almost chipped the teeth of many dear furry friends of mine.

So what is a good test? Try them yourself!! I know this is crazy, you don't have to eat them, but seriously, try to just see how hard it is to bite on!

Also, try pressing on them, or squeezing them and see if they give any. My treats are really squishy right out of the oven (like cookies) so I know when they are dehyrated enough when they don't "give" any when I press on them.

      Remember the size of the dog: I did not think of this aspect of dehydrating either. I have a huge 110 pound lab that can eat anything, but I also have friends who have a miniature dachshund and they need to be able to eat them too! So you need to find the right balance.


How long will they last?

That depends on the treat, the recipe, how long you dehydrate etc.

I have a sample going right now in my kitchen. A regular sized bone, about 3-4 inches, of a typical pumpkin recipe, moderately thick, dehydrated for 4 hours. We are going on 4 weeks and they are looking great! I can still open the bag and they still smell fresh and look wonderful. They show no signs of mold and they aren't cracking or breaking!
Normally they wouldn't last more than 4-5 days without molding.

And if you are like me, you need to write everything down to be able to remember. So I created a document that helped me keep track of what I was dehydrating, what time it started and how long it took.

So I shall share it with you to help you out! HERE!

You can dehydrate so many more things than dog treats! And many things can be dehydrated and use as dog treats! (I'll talk more about that later!!)

Good luck!!

Banana Pupcake with Peanut Butter Cinnamon Frosting

I guess it is no secret that I love baking. I love the look and smell of baked items of all kinds. Especially if I get to eat it when it's done! BONUS! But even if I don't it is so fun to make and decorate! I decorate all kinds of cakes when a family member's birthday rolls around, I'll have to showcase those later.

Well, I enjoy making pupcakes for my dogs. They love the variety of this dessert for special occasions (I call Monday night a special occasion because it's just a miracle that we made it through Monday!)

These would be way fun to make if it was your dog's birthday or perhaps you are hosting a dog birthday party and need some "cake"? Or maybe you just know a crazy dog lady who would enjoy one for her dog?

This is the same concept as giving your child a cupcake or chocolate cake for their birthday and watching them destroy it. Is the parent stoked to eat the cupcake? Well maybe, but mostly they are excited to take pictures and see the look on their child's face when the cupcake is presented. Same concept. Dog parents love watching the expressions and destruction of the cupcake by their dogs. It can be hilarious!

All that to say, here is my recipe for banana pupcakes (smell just like banana bread!!) with a peanut butter cinnamon frosting.


Recipe:


1/2 Cup Water


1 Whole Peels Banana

1/4 TSP Vanilla

1 Cup Whole Wheat Flour

1 TSP Baking Powder

1 Egg

1 TBSP Honey

Preheat oven to 350 degrees.

Mix all ingredients together.

I used a small cupcake pan instead of the regular sized pans. I like the idea of a bite sized pupcake as opposed to a giant cupcake. Much cuter :)
This recipe made approximately 20 mini pupcakes. Feel free to double or triple the recipe to make however many you need. 
I baked them for 15-17 minutes at 350 degrees.


Peanut Butter Cinnamon Frosting Recipe

4 oz Non-Fat Cream Cheese

1 1/2 TSP Cinnamon

1/2 TSP Vanilla

1 TBSP Honey

1 TBSP Peanut Butter

Mix all ingredients together until smooth and spreadable. If you need, add more honey to make it creamier. 


I then put the frosting into a zip-loc bag and cut the corner off to be able to pipe through the bag onto my pupcakes. 

I then pressed one of my homemade dog treats onto the top and sprinkled some fresh cinnamon on top and voila! Perfection!