Circus Themed Baby Shower


So several weeks ago I had the absolute pleasure of helping to put on a baby shower for some great friends and it was so much fun!

I LOVE planning parties and decorations and invitations and organization and food! I have never been involved in planning or decorating a baby shower and I kinda just took over this shower because I was so excited to get everything together on this one!

I decided that a circus themed baby shower was possibly the cutest idea anyone has ever come up with! Thank you Pinterest for so many ideas!

So I wanted to share with you the pictures from the shower because it turned out soooooo cute! And you know me, I did everything as cheaply as possible! So I shall share some of my finds and ideas with you as well :)


FOOD TABLE

Most of the items are from the Dollar Store: Pop Corn bags, small glass jars, candy, styrofoam boxes..


These paper cones were so fun! I wrapped a styrofoam box with wrapping paper, then stuck BBQ grilling sticks in them with a paper cone around each stick, then filled the cone with taffy! The cones are just paper wrapped and taped into a cone. SUPER EASY!

I found some peanuts at a local ranch and feed store and filled glass vases I had around the house for decoration. I also found some tickets at Wal-Mart and filled vases with tickets for decoration as well!

The full view of the table! I found out what all the hostesses had as far as cake platters or dishes that would all work (glass) and used them for the food.

I made all these flags and they were easy and cheap. Michaels was having a sale on their 12x12 paper so I went crazy and picked out some fun patterns! Then it's simply tracing and cutting. I cut BBQ grilling sticks I had laying around down to size and taped the flags on. They were a CUTE addition to the cakes and cupcakes.


ANIMAL CRACKERS! We wanted enough of these to go on the tables for each person (also kind of a take home gift for each person) but they are hard to find. Wal-Mart had perhaps 5-7 each time we went and we could not go back 10 times and we bought them out each time. So we just used them as decoration.

Again, I wrapped boxes. These are USPS Priority Mail boxes that I wrapped in tissue paper, wrapping paper and then sometimes put some ribbon on. It was great to give some height to the table.


This was so easy to do! I found it on Pinterest. Check it out here. We printed out the letters and backed it with some red paper we bought at Michaels. Clothes pins are from the dollar store.


SEATING TABLES

These glass jars are from the dollar store, as well as the pop corn bags. We popped tons of popcorn to fill these bags and it was great because people snacked on it all night and even took some bags home with them. They served as decoration and food!

Every table had some balloons, popcorn and peanuts!
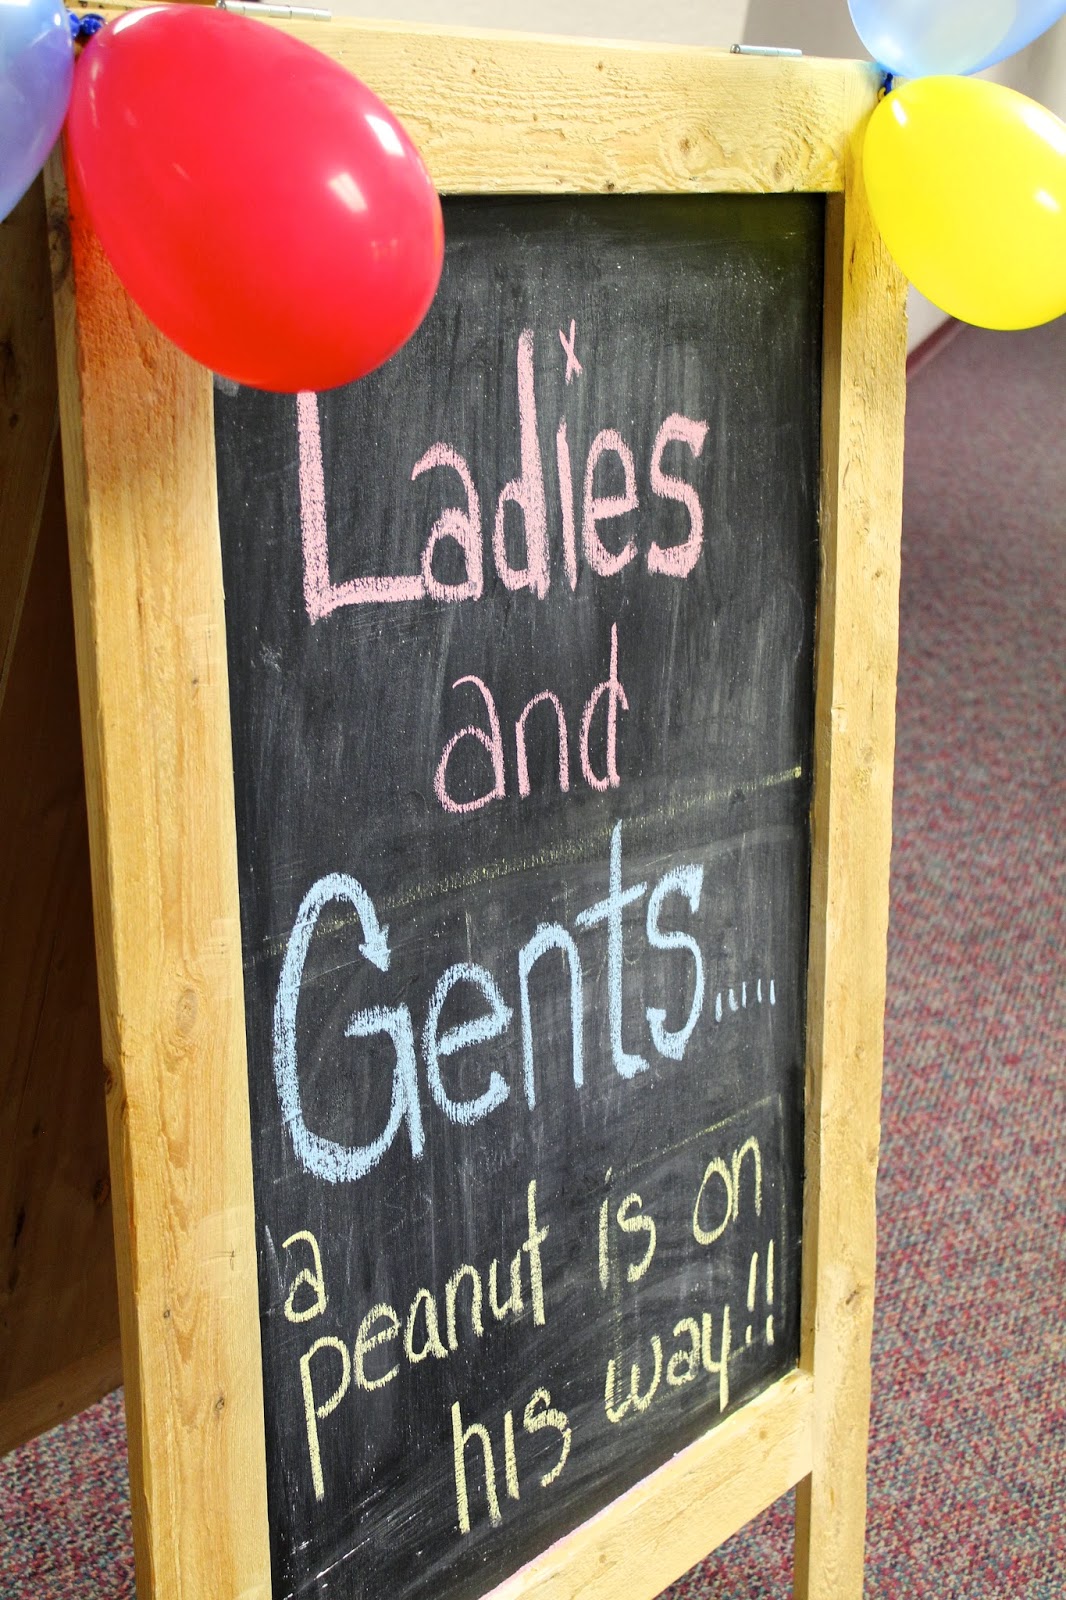


FRONT SIGN


We were able to track down a chalk board to welcome the guests!


This was just a really fun shower, it ended up being not too expensive and everything worked well together. I am already preparing for another shower and will post pics of that when it happens! So fun!


Halloween Dog Costume Ideas

I cannot believe that Halloween is so close! And it finally feels like fall so I feel justified in making pumpkin cookies and treats for myself and not just my doggies :)

I found myself beginning to think about what to have my dogs be for Halloween. I, myself, hate dressing up in costumes, but I choose to believe my dogs love it, even if only so they can tear their outfit to shreds later...

And I will not spend any kind of serious money on a costume for my dogs, one because they are monstrous and instead I should look for costumes for miniature ponies, and two because I have no money to spend.

Therefore I looked all over the internet for some clever, inexpensive ideas and I thought I would share them.
This I think is my favorite one. One because I have never seen it before and never saw it since this picture, so I guess you could say it's unique. It is one of those that is so simple everyone wishes they thought of it. But alas, I don't have an adorable football sized brown lab....maybe I need one?
This made me laugh out loud! Adorable!!! This dog has the perfect coloring for it. My dog on the other hand is the perfect SIZE OF A COW, but is blonde...this one isn't for me, but I couldn't pass up posting its cuteness!!


Now this is more my style, cheap, easy and incredibly appropriate! Molly would hate being stuffed in a box, but if I could even get one picture out of it, it might be worth a try.


This is also tremendously appropriate for my beast of a dog. I like this cause it's easy. All you need is one piece to make the costume. She would look ridiculously cute!!! How can I decide?


Ah, all great aspirations aside, let's be honest. This is what she will actually wear for Halloween, except it will probably be an old t-shirt and not a bed sheet, cause let's be honest, I am thinking about dressing an overgrown puppy and this is probably more realistic.


This is adorable so I had to post. Especially on a bigger dog, Great Dane perhaps! Adorable!


This is just genius! I don't know how they did it, chalk maybe? but it's perfect. The dog wouldn't know anything was on them! 

And if you have this kind of dog, PLEASE, it must be a Target dog! I'm actually a little jealous mine can't pull this off.


This would have worked perfectly with Oreo, my older dog you passed away several years ago. 


Finally, if this is not the most appropriate thing in the world I don't know what is! 


Check out my pinterest to see what other ideas for Halloween I have found!

And be sure your doggie gets their share of tricks AND TREATS this Halloween. I have some very special grain-free pumpkin Halloween dog treats


DIY Dog Treat Vendor Ideas

So after looking through all my pictures on my last post, I will show you how I did it and where I bought everything. I try at all times to stay as cheap as possible, although it may not be the easiest way possible.

To start off, if you are doing your first event I HIGHLY recommend setting up before going. Practice, practice, PRACTICE! I started setting up my table about a week before the event and as I made or crafted things, I set it up then by the time the event came I knew how I wanted it to look, took pictures and then recreated my display at the event.
To help create some depth or whatever kind of look I am talking about, I used cardboard boxes. I used USPS Priority Mail boxes to be precise. I have so many sitting around that I ship dog treats with, so I decided I could use them to set my treat displays on so I didn't have a flat boring table.

I used sticky notes as my temporary labels which turned out to be super helpful because they were not only easy but the perfect size and I used their 3x3 size when making my own labels.

Trying to stay cheap, I looked around my house for things I could use to display instead of buying more stuff. These two metal "trays" are what I use for mail, receipts and papers on my desk.

I was at the dollar store one day and picked up 3 glass jars to see if I would like the way they looked, turns out I did, so I used my handy-dandy sticky notes to show me where I would put the rest of my jars after I went back and bought more.

I numbered the sticky notes according to what item would be displayed there.

Then I slowly replaced my sticky notes with the real deal...

FLAG/LABELS/SIGNS


My individual signs were wonderful and I am in love with them and now use them at every event, shower, party I can! Like I mentioned in my last post, I ran across a sale at Michaels where all 12x12 paper was 6 sheets for $1 so I gathered all kinds of designs and colors that are associated with my shop.

Like I said, I used the size of a sticky note to size up my own signs/labels.

All my colors that I stocked up on :)

I sized and printed them on the computer and then used my handy paper cutter to make sure they had straight lines.

Then I simply double taped the words to the paper and.....

voila! I had some BBQ grilling sticks sitting around the house I measured out and chopped off to use. I taped them to the back of these labels and they were ready to go!
Then I gorilla taped (yes, it's called gorilla tape) to the back of whatever they went on so that they STAYED!

BOXES

Overall, I think I used 7-10 boxes for my display. All I did was tape the boxes together as if they were being shipped and wrap them in all kinds of wrapping paper that I had around the house, of them were even wrapped in tissue paper cause I didn't want to go buy wrapping paper (I told you I'm cheap!)
I used all the sizes, large, medium and small. I wrapped some in the 12x12 paper I bought at Michaels too.


Then I gorilla taped them to the table so they wouldn't be blown away and they worked perfectly! 


OTHER DISPLAY ITEMS

GO to the DOLLAR STORE! Seriously, you will get ideas of your own, plus everything is a dollar. I picked up all these little jars as well as the white baskets at the dollar store and they were great for holding treats! 

Then I used picture frames from around my house. I love black and white so I had a lot of black and white frames that worked perfectly with the color scheme I have for Treat Dreams.

My table cloth (guess you can't call it cloth when it's plastic, but whatever) was 99 cents at Wal-Mart in the party isle. It was the perfect color. I wanted something that would catch everyones attention on that cold yucky day and this did the trick. Although it was only a one time use kind of thing, it was worth it for 99 cents. 


MY BOARD

I highly highly recommend having a board or some kind of place to display other information you want people to know, plus it draws the eye. 

Many people came over just to look at the board! I used only pins on everything. This is a board I use to display things in my room, so I didn't want to glue anything on the board. 
I printed out everything on this board, even the pictures. Although it would be easy to take and print pictures at Walgreens or CVS too.
Put up what you want people to know about you. 
I wanted to create something personal so I put up pictures of dogs that are some of my biggest fans, but I wanted them to know what we are capable of as well, Christmas dog treats and Birthday dog treats. So it was a way to advertise too.

After the event, I found an empty rubbermaid box in the house that I then labeled "Treat Dreams Event Supplies" and I kept everything I could so that I wouldn't have to start from scratch next time I had an event.


This was just my very first event, so I know I will probably change everything and hopefully do much more in the future, but I was pretty please with everything and wanted to share my ideas with you!


My Dog Treat Vendor Display

So like I just posted, I participated in my first event as a vendor and I had no clue what I was doing. I thought either I was going completely over the top and people would think I was vain or pompous or I would be nothing compared to every other experienced vendor and would be chasing my blown-over tent, running out of cash or standing alone with no customers looking sad.

And although this was my first event and I don't know much about how many treats to actually make (when hopefully not at an event where it rains all day and you see 50 people) or how much cash to bring and in what amounts. I did have a great set up. I received many compliments from my presentation and I believe it brought about many sales and I am very proud of it so I thought I would share my ideas!

Here are the final pictures of my set up:

I had a single 9'x9' tent that sheltered a 8' table underneath in which I displayed all my treats and conducted business.


I split my table up, on the far left is my board that I decorated that announced what was coming up (CHRISTMAS!) and what we are able to customize (Birthday Baskets!). It also displayed some of our fans which was way fun to showcase!

I printed everything off myself on my printer (even the pictures). To make it more fun and to stand out more, I caught a sale at Michaels where all 12x12 paper was 6 sheets for a dollar so I bought all kinds of colors and designs and backed every sign or picture on my board. 

Then in the middle of my table is where I displayed my all natural treats. I picked my most popular flavors and shapes (probably had about 6-7 variations on display). 


I used a picture frame I had in my house to display the price of these particular kinds of treats, but after completing the day, I should have also put the price on the individual flags (above picture) as well. I will change it next time to read "Gluten-Free Blueberry Bunnies - $8.00/Bag"

Then on the right of my table I displayed my decorated treats!


This sign seemed to be pretty clear to people, I guess because it says "Decorated" and people understand what that means, as opposed to the word "all natural" where it is harder to tell just from looking at my table.

To see how I made my display cards and boxes, look here.

The BEST idea by far of the whole day and will forever use, was a SAMPLE treat jar!!

This brought dogs to my table and made them want to stay at my table while their owners looked at everything. I will pick another flavor next time I think, blueberry is definitely great, but some dogs are picky and I think peanut butter is a more universally enjoyed flavor!

Then displayed throughout the table (covering bald spots or taking up space) were some picture frames displaying my other products that I was not able to make for the day, as well as some other variations of treats that were sold individually.


Another great idea (although I needed more people for it to be successful) was some kind of free candy!
If we were indoors, I would have chosen chocolate kisses or something similar, but since we were outside, I thought best to not chance chocolate melting :)

To see where I bought everything and how I made it, look here!